
|
Post contents ● Install Yoast SEO and basic settings ● The Yoast SEO Setup Wizard ● Yoast SEO Advanced Settings Configuration 01. General ■ Desk ■ Characteristics ■ Webmaster Tools 02. Appearance of the Seeker ■ General ■ Content Types ■ Media ■ Taxonomías ■ Records ■ Breadcrumbs ■ RSS 03. Search Console 04. Social ■ Accounts 05. Tools ● Import and export ● Mass editor ● Usando el Meta Box de Yoast SEO ● Content optimization ● Social ● Advanced
|
When we create a web page sooner or later we consider how to improve SEO so that our website appears in Google search results. When we talk about SEO plugins for WordPress, the best option is SEO Yoast, a plugin that makes it easier for us to make our pages more Google-friendly and although SEO is a complex issue, the options of this plugin help us to configure fundamental aspects for achieve effective On Page optimization.
It should be clear that the plugin is just an assistant, a tool that can help you with the configuration and improvement of certain aspects that can influence SEO. If you think that installing an SEO plugin is going to launch you to the top positions of the search engine, you are very wrong. SEO requires a set of actions such as On Page optimization of the site, the correct use of the keywords for which you want to position yourself and quality content.
Throughout this 2020 Yoast SEO has implemented a series of improvements and has corrected errors that occurred in previous versions. As of the date of updating this post YOAST SEO has released version 14.5
With these updates YOAST not only manages to improve and make it easier for the user to optimize on page SEO, but it also makes it easier for Google to ensure that your page can be crawled and displayed in search results.
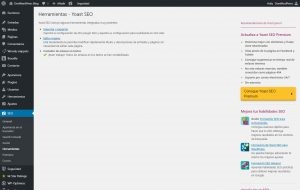
Install Yoast SEO and basic settings
Like most plugins, we can find Yoast SEO in the WordPress plugin repository. From the Plugins section of the WordPress administration side menu we click on “Add New” and enter “Yoast SEO” in the search engine, once the plugin is displayed in the search result we select “Install” and then “Activate ” .

The Yoast SEO Setup Wizard
Once installed, access the summary of the plugin from the SEO option that has been added in the WordPress side menu. We can use the configuration wizard that the plugin has to do a first basic configuration of our site.
Step 1: Environment
If your website is in production and can be accessed select Option A, if on the contrary your website is still in the development phase select Option B.
Step 2: Site Type
Select the option that best suits your website.
Step 3: Organization or Person
If you are configuring Yoast SEO for a business website or an ecommerce site, select the Organization option. Fill in the data with the name, upload an image of the logo and the profiles on social networks in which the company is present.
This data helps Google to generate a Knowledge Graph or Knowledge Graph. A search result format in the form of a card with generic information about the search result according to the keyword entered in the search engine. With this resource, Google makes a display of basic content but as complete as possible around a topic. So the information entered in this step is very useful.
Step 4: Visibility in search engines
In this section we can select the type of content that we want to appear in the search results in the event that it is necessary to omit any type of content.
As a general rule, it is better to leave it with the options that are marked by default.
Step 5: Multiple authors
If the content of your page is written only by you, check the option No. In this way Yoast SEO will prevent Google from detecting the author pages as duplicate content with a noindex.
If the page is going to have several authors, then select YES, so that Google can show the files of each author in the Google results.
Step 6: Google Search Console
To allow Yoast SEO to connect to Google Search Console in order to import information about our website, just click on Obtain authorization code from Google, paste the code you provide and authorize .
If you do not use the free Google Search Console tool, we encourage you to access and verify your websites as it is a really useful tool for Webmasters. But if you are not going to use it, do not worry because it is not necessary for Yoast SEO to work.
Step 7: Title Settings
With this option you configure the format of the title that will appear in Google search results.
The way in which it will be shown to us will be as follows:
Title of the page or entry + Separator + Name of the Site
In this section we can change the Name of the site and choose the type of separator we want.
The next two steps are not relevant to plugin setup and can be skipped. Step 8 is to subscribe to the Yoast SEO newsletter, Step 9 is to purchase other Yoast plugins.
Just click next until you get to step 10 and then click Close.
With this you would already have a basic configuration of your website with Yoast SEO. Easy, right? Want to tweak your Yoast SEO settings a bit more? Well then, keep reading.
We are also developing a site WordPress Development Service in Lahore.
Yoast SEO Advanced Settings Configuration
From the Appearance option in the Search Engine we can control some that improve SEO On Page making it more friendly for Google in order to improve search engine positioning.
01. General
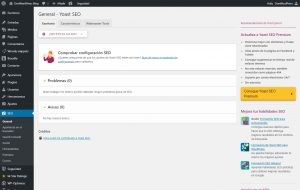
Desk
The plugin notifications appear in this first section. Some notifications may be SEO problems such as search engine access being blocked, this usually happens if our site is still under construction and we have activated the option Discourage search engines from indexing this site in Settings> Reading settings .
Other minor notifications may refer to plugin updates or warnings to connect the site with your Google Search Console account and thus have control over possible errors and access to metrics.
Characteristics
From this section we can activate or deactivate the Yoast SEO plugin. By default they are all activated, we recommend you leave it with the default configuration unless you have knowledge and need to change it.
Seo Analysis
Thanks to this function Yoast SEO makes an SEO On Page study of the content you are publishing based on a keyword. We will see this analysis in the Metabox but we will get to that part later.
Readability
analysis This analysis is more focused on the way our content is written. That is, if it is well written, if we use very long paragraphs or if we make good use of subtitles.
Essential content
This option will allow us later to indicate the content that you want to be more relevant. For now, leave it checked, when we get to the meta box section we will explain this option a little more.
Text link counter
In order to improve the internal link structure of your site, with this option activated the SEO analysis will indicate the links we have to external content as well as the links to other posts on our blog.
Sitemap xml
With this option active we are generating a file with the sitemap. This file is quite important for content indexing by Google. To tell Google what your sitemap is and to facilitate the indexing process, go to your Google Search Console account. Click on the sitemaps option that appears in the side menu and indicate the path of your .xml file in the Add a sitemap option. If you are not sure what the path of your file is, you can see it from the option See the XML sitemap that is shown when displaying the help of this option.
Ryte Integration
This active option allows indexing and scanning for errors by the Ryte platform.
If you use other tools for this purpose you can mark the box as inactive.
Administration bar menu
You can allow or not allow a shortcut to Yoast SEO to appear on the top bar.
Security
Leaving this option deactivated we ensure that only page authors with administrator permissions can make advanced changes that affect SEO On Page.
Webmaster Tools
From this option we can verify our site in different tools for webmasters. Do not worry about this, if you have little experience we recommend that you verify your site in Google Search Console and do not worry about the rest of the tools.
02. Appearance of the Seeker
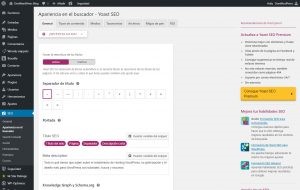
General
From the General option we control aspects that affect the entire web, in addition to the home of the site.
Title separator
It allows us to configure the symbol that will be used as a separator between the title of your publication and the name of the site. By default we will see the one we have selected in step 7 of the basic configuration with the configuration wizard
Cover page
From this section we can add an SEO title and a meta description to the main page of our website.
You can add variables like Site Title or Short Description. To configure the values of these two variables, go to Appearance> Customize> Site Identity in the WordPress administrator’s side menu.
Do not overdo the size of the title and description, the ideal would be to use about 65 characters for the title and about 155 for description. You can help yourself with an online tool such as http://www.character-counter.com/character-counter-para-seo.html to control the number of characters you use, for example.
Keep in mind that the title is very important in SEO On Page. This must be unique on each page and should refer to the keyword with which we want to position ourselves.
Knowledge Graph y Schema.org
If we have filled in the data in step 3 of the basic configuration with the Yoast SEO wizard, you will not have to do anything.
Content Types
In this section we handle the settings for the pages and posts. In the case of having created content with a Custom Post Type it will also appear here.
From here we add the SEO title and the meta description to each different type of content on our website but in a global way. The titles will be different from each other thanks to the variable “title” but the description must be customized, but later we will see how to do it individually and manually.
Although, as we create content, the titles and goals are entered individually in each entry or page, it is a good practice to leave a global configuration defined in case we leave an entry or page without a title or description.
We advise you to leave the Date in the preview of the hidden snippet. In this way, it will not show the publication date of the article in the Google search results, thus avoiding that your oldest posts seem obsolete to the user and do not click on them.
Regarding the Yoast SEO meta box option, leave it in the show option, in this way we can customize the SEO On Page of each page individually as we have commented above in the case of meta descriptions.
Media
We recommend leaving the option marked by default, which is Yes. In this way, the images that are displayed in a search will link to the content that has that attached image. That is, if a user finds an image in a Google search and clicks on it, the link will take them to the page or entry that contains that image.
Taxonomías
Taxonomies are criteria that have a type of content in common. For example, a WordPress post has categories and tags that classify it in one way or another.
Unless we are working with a Woocommerce or have created custom taxonomies with Custom Post Type, here we find categories, labels and format as base taxonomies.
Categories and labels
As with the posts or pages, from here we create titles and descriptions at a global level. We will have to customize them one by one and for that we must leave the Yoast SEO meta box option with the Show option.
The option Do we show Categories in search results? In principle you should leave it with No marks in case you are starting and have little content, when your blog has more content you can activate it. In this way we avoid having “thin content” pages (pages with scarce and low quality content) that can negatively affect the position our page occupies in search results.
Format
Leave the option in Active but check No in Do we show Formats in the search results? WordPress formats are more and more in disuse so it is not a very relevant option right now.
Category URLs
The ideal would be to have a personalized structure in the permanent links, so in this option nothing would have to be modified. If you have doubts, it is best to leave it with the option defined by default.
Records
If during the configuration process with the wizard we have marked that there is only one author on the blog, we can skip this option. In the event that there are several authors of your blog, the option Blog Authors will be Active.
We recommend you mark No in Do we show Categories in the search results? in the case that you are starting and have little content to avoid having pages with little content and that are not relevant. When your blog has more content you can activate it.
Do the same with the File Settings by Date and mark it as “Off”.
Breadcrumbs
The breadcrumbs are the typical links that indicate to the user where they are on the web. For example: home / blog / category / post name.
Normally, the option to activate or deactivate it is in the settings of the template we are using. If not, YOAST SEO itself offers us the possibility of implementing it, so you can follow the steps in its manual.
From here we recommend that you activate them only in two cases: That you are working with an ecommerce store that has many categories, subcategories and products, or that your website has a lot of content and you have it well ranked.
RSS
Although it is not an SEO option itself. RSS can be a source of traffic to our website as it allows users to subscribe to feeds and receive alerts in their mail or in rss managers every time we create new content. Staying informed in real time of the news that we publish on our site.
In this option we can customize the appearance of the feed being able to show a text before the content of the feed such as: “This DonWordPress post will interest you”
We can also include a text to close the feed after the content and customize it with variables such as: The entry %% POSTLINK %% was published first in %% BLOG LINK %%.
03. Search Console
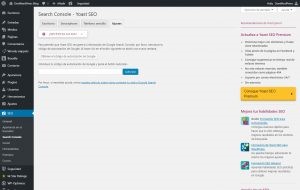
If you did step 6 during the basic installation with the setup wizard, you don’t need to do anything in this section.
If you have not verified your site, we recommend that you do so, so Yoast SEO can import data and statistics about the behavior of your website. To do this, click on “Obtain the authorization code from Google” access with the account that you have linked to Google Search Console, copy the code and paste it in the field enabled for it and finally click on “Authorize”
04. Social
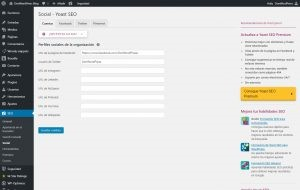
Although Social Networks are not related to SEO, if you maintain a relationship. Google does take into account the presence of our brand on social networks as well as the interaction that followers have with it.
In this section you configure the information that will be displayed each time one of your publications or other content is shared on social networks.
Accounts
From here we indicate to Google in which social networks we have a presence. The boxes may already be filled in if you completed the data in step 3 of the basic setup with the Yoast SEO setup wizard.
We recommend that you activate the “Add Open Graph metadata” box. In this way, when a user shares a blog post or a product from your website on Facebook, the title, a short description, the photo that accompanies the publication and a link will be displayed.
In Main page settings we fill in the information you ask for. This is similar to the previous step but it works for the case where a user shares the main page of your site.
Although each publication of our blog or ecommerce product has its own images, we can define a default image for when it is shared on Facebook and the post or product does not have an image or an error occurs when sharing it. For this we only have to upload an image from the Default Settings option.
Similar to the Facebook tab, from here we activate the Add Twitter card meta data box to make use of the twitter cards. In this way, every time someone shares content from your page on Twitter, the title, description and main image will automatically appear.
Pintarest and Facebook use the same Open Graph metadata. If you have already selected the box in the Facebook tab, you will not have to make any further settings in this section.
05. Tools
This section includes some tools that when the time comes can speed up any task.
Although it is not necessary to know them for an SEO configuration, it is possible that in some specific cases they can be useful.
Import and export
From this tool we can export our plugin configuration in a .zip file and use it on other sites with the option to import.
We can also import the settings of other SEO plugins that you have used and import them for Yoast SEO.
Mass editor
With this option you can quickly modify titles and descriptions of the content without having to go to the editor one by one.
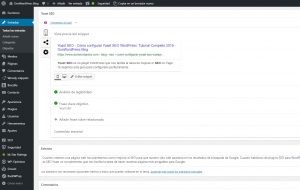
Usando el Meta Box de Yoast SEO
With the previous steps we would already have configured the Yoast Seo settings. Now if we create new content or edit an existing one we will see the meta box just below the WordPress editor.
The meta box allows us to independently make advanced changes as well as configure options in social networks and analyze the quality of the content according to the keyword.
Content optimization
In this section, the plugin performs an SEO analysis based on a focus keyword to optimize and returns a result with tips to improve. For example, if the keyword is in the title, what is the density of the keyword, if it appears in the meta description …
A series of colors as a traffic light indicates the level of optimization, but don’t worry if it doesn’t you can reach the highest level, green. Many times we must give more priority to the wording of the title or meta description to be fluid than to have the green level in the plugin indicator.
Remember that the plugin only makes us an SEO On Page level audit, to find the perfect keywords for your website you should do a keyword study before proceeding to SEO On Page optimization.
Previous view of the Sniper
Earlier we did a global setting for titles and meta description globally. From this tool we can make a personalized configuration and give each page a unique description or edit the title if necessary.
This point is important as this information is what will show up in Google’s organic search results. Try to write it in a way that encourages click and does not exceed the character limit that Google sets.
Readability analysis
It tells us if our content is easy for the user to read or is well structured, among other indications.
Target key phrase
Here we mark the keyword on which we want to base our positioning, this alone will not position in Google. You need to generate quality content on the topic that the chosen keyword refers to.
Essential content
Activate it when you want to tell Google that this content is more relevant than others on the site and that they deal with the same topic. It is very useful to give more importance to certain posts when you have several articles in a blog and you want to highlight one in particular.
Social
In the Social option, we made a configuration to define how the content is displayed when a user shares it on social networks. In this tab you can manually configure the title, description and image when sharing via Facebook or Twitter.
Advanced
In this section you can configure aspects that are related to the indexing of the pages of the site.
From here we can configure if we want Google to index this content, we can also allow Google to follow the links.
The canonical URL section avoids duplicate content by telling Google which page to take into account for search results.
conclusion
Yoast SEO is a very complete plugin that allows you to control many aspects of the SEO On Page of your website. The great advantage of this plugin is having the results of the analysis in real time, which together with the configuration wizard greatly facilitate the task of optimization. But remember that the installation of the plugin does not guarantee that your page will reach the top positions in Google search results, for this you will have to do a preliminary study of the SEO strategy that you are going to carry out on your website.
We hope that this post has helped you to make a correct configuration of your website and you can get the most out of this complete plugin.