
Whether or not being worn for breaking point or plan, an all-around made cowhide belt can endure always and forever. Notwithstanding, many “valid cowhide” belts accessible to buy at stores are a layered, manufactured material more contrasted with a calfskin pressboard than genuine calfskin.
Such straps are sewn together by sewing machines, which don’t propose as solid of a join as sewing cowhide indeed and will generally separate and self-destruct with time. Want the best quality belts? If yes, then try Rockabilia. Only at Rockabilia save a 30% discount on high-quality t-shirts, belts, shoes, sweatshirts, bottoms, accessories, and other items. Apply the Rockabilia Discount Code while purchasing to save more bucks on your order.
Why not make your strong belt, from a particular piece of genuine cowhide, that will last various years and give an impression of sureness as you wear something you arranged with your own two hands?
In this instructive exercise, we’ll cover the essentials of how to make a moderate calfskin belt with significant contraptions.
Materials/Tools
This article advises the ideal way to make a belt from a colossal piece of vegetable-treated cowhide. You can buy it at various specialty stores or online at TandyLeather.com. You could even use this technique to make a belt from an old cowhide loveseat or other full-grain calfskin things. Notwithstanding, you can utilize whatever calfskin you approach to give you the length you want. However, maybe not as intense.
Cowhide
Belt gets
Surveying tape or ruler
Long straight edge
Utility or another sharp front line
Turning punch (discretionary)
Bolt setter and bolts
Olive oil (or other fulfillment of your decision)
Surveying for Belt Length
Above all, you’ll need to know the belt length required, either by evaluating against a current belt or surveying your midsection with a string or assessing tape.
If surveying against a current belt, measure the through and through the length of the belt and add 2″ for the security flaw (clarified later in this article). On the off chance surveying your waist, add 8″: 2″ forget foundation and 6″ for the belt tip.
Slice the Leather Strap for Your Belt
To begin making your belt, you must first create a lash from cowhide. When cutting the tie, you genuinely need to have a uniform width all through, so you’ll have to begin by making a straight edge, in a general sense, the length of your belt.
You can incorporate any straight edge for this, like a level, a steel ruler, or even a straight piece of wood when central. One might guess that you ought to wipe out some piece of calfskin that can be saved and utilized for other minor activities.
Exactly when you have your central straight line, measure and etch your one 1/4″ width (or whatever other width you’re going for, by and large, some spot in the extent of 1 and 1 1/2 inches) each 12-18 hauls to make guide markings. (Also, be sure your width matches the catch you have close by.) From here, you can find either a copy of a standard with a pen and a straight edge or use a metal ruler to fill in if all else fails for your cut.
Usually, you’ll additionally foster outcomes including a metal partner as a straight edge; fundamentally promise you to apply firm plunging strain with your non-slicing hand to keep the ruler away from slipping and be cautious when cutting close to your fingers.
Making the Tip
Since you have a one 1/4″ wide tie, you’ll need to figure out which side you ought to be on the trick end and which side you ought to be the “tip” or “tongue.” Comprehend that the tip end of your belt may undeniably include simply a standard edge or a level cut. It doesn’t have any impact, which, pick aside.
These can wind up amazing and are less work, yet two unique systems make the belt tip more direct to slide through the attach.
The main philosophy, and most basic technique, is simply making an inclining cut that leaves a point on the tip of the belt. Expecting you need a changed edge, there are instruments explicitly for that, yet you can in like way achieve a general contact with an aluminum drink can.
To achieve this:
- Start with a 90-degree slice to give yourself a straight-edged consummation to work.
- Beginning there, mark the place of the combination of the belt at ½”, equivalently 1″ down on both the left and right sides.
- Change an aluminum can on the spots to use as a partner and follow a curved line.
- Cut that line with your utility edge. What’s more, the main thing is clear to everybody: a changed edge.
Create Belt Holes
You’ll need to add five openings on the tongue/tip end of the belt for the affix’s prong to relate through.
For the fundamental opening, measure 6″ in from the tip of the belt and make an etching zeroed in on the cowhide lash. Right when you have your covered up opening ventured, mark an additional two spaces in the two headings at 1″ and 2″ from the signature checking. This will make you cover up to five openings, every 1″ disengaged if you can add fundamental, more later.
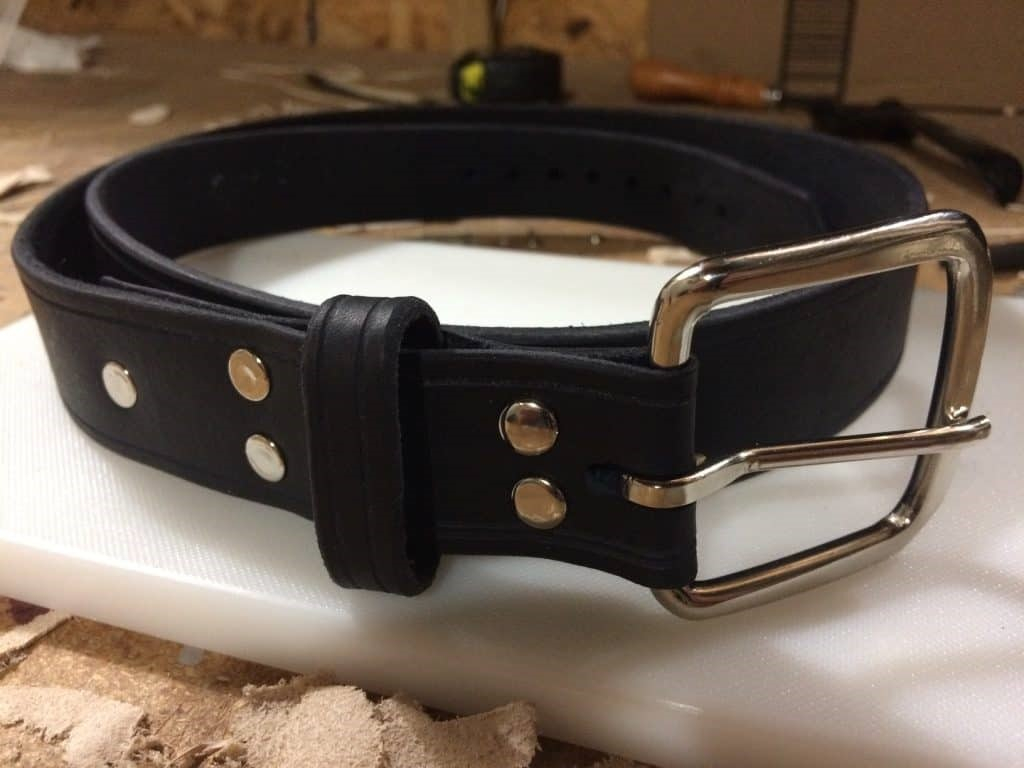
Once ventured, you’ll need to place these openings into the belt. At this point, there are various techniques for invading the beginning of the cowhide. In the picture here, I utilized a rotational punch.
Reducing the Buckle Side
Before long moving to the attached side of the lash, trim the calfskin to a 90-degree point so you have a straight edge to work. While adding a catch, the cowhide will be sworn by itself to “trap” the attack into place (suggest stage 6 tolerating that you’d like a visual). Accepting that you’re utilizing an honorably thick cowhide, odds are you’ll have to thin the material where it folds to keep away from a clumsily wide circle.
Measure and etch 3″ in on the tissue (disturbing) side of the calfskin. You’ll need to thin the cowhide to ordinarily 50% of its thickness, spreading more than one inch in one or the other heading of the etching that you’ve made, so you have approximately 2″ of diminished material focused from the 3″ mark.
Utilizing a sharp falling edge or a utility edge, carefully “thin” the cowhide by holding the best in class fundamentally level against the calfskin and scratching or “shaving” unassuming measures of material away until it is an overall portion of its original thickness. You can all things considered kill more, yet you can’t add cowhide back, so be patient and careful about this development.
Tolerating your hope to make belts to some degree consistently, you ought to consider setting resources into a success beveled to complete this cycle quicker and more secure.
Setting up the Leather for a Buckle
Whenever you’ve diminished the belt, you’ll need to wrinkle the cowhide over the decreased piece and acclimatize its water. Allow the water to lower the calfskin, making it more malleable and versatile, as well as more ready to hold its shape.
Measure in 2.5″ and 3.5″ from the tip and make openings at those etchings utilizing whatever strategy you saw as frequently crucial in the opening punching article alluded to as of now. Exactly when these two openings are made, you will use a utility bleeding edge to make two slices to cooperate these openings into one broadened portal.
Cut from the given side of one opening to the left half of the other opening and rehash the correspondence on the right side until you have a 1″ plan zeroed in on the diminished piece of your cowhide. Right, when this opening is made, the tongue of your catch should slide through the created space, and the belt should overlay over level, as imagined.
At this development, it’s fundamental to affirm that the belt gets “straight up” to work with the opening side of the lash. Setting all that up can be befuddling, and understanding the lock is a logical expansion.
Wrapping up
There is a comprehensive gathering of ways to deal with completing a belt like this, which can get genuinely tangled, particularly for the new leatherworker: concealing, staining, disguising, antiquing, oiling, and so on.
Something significant that you can do is rub-down the grain (smooth) side of the cowhide with a light layer of olive oil on a paper towel; I’d urge against oiling the tissue (unpleasant) side since it will tumble off on your garments. It will offer a quick trim of the calfskin that will potentially obscure it and help patina.