

The best article gets exhausting without representation and shading. That is the reason we generally add pictures and delineations to our how-to articles, and that is the reason you need to do likewise in your WordPress site blog. Be that as it may, how might you add photos to your blog?
The best is to open your WordPress administrator site in another program window and do the means promptly as you read about them in this aide.
Add the primary picture to your WordPress article nbcsports/activate.
On the off chance that you have an article composed, that is awesome. When the paper is written, it is simpler to attempt the distinctive manners by adding a picture and different media to your WordPress establishment. In your WordPress administrator instrument, either make another page or make another post (or alter an article you have composed before).
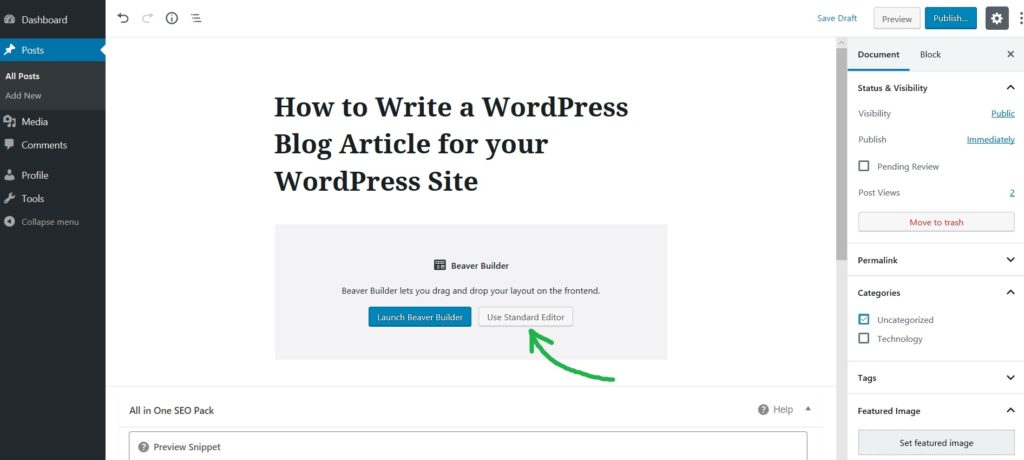
Once in the supervisor window, you will see the region where you can write the article’s title, and underneath it, you will discover the case where you can type in the substance of your post. To add an image to your post or page, you need to find the “Add Media” button on the left side underneath the theme region or the substance region (see delineation underneath this text).
When you press the Add Media button, another window will show up where you can pick between transferring a document or choosing a record from your media library. Assuming the image you need to add to the page or post is situated on your PC, pick transfer documents. You will then, at that point, see a screen advising you to “Drop records anyplace to transfer”, and it additionally has a button saying: “Transfer documents.”
On the off chance that you have an envelope open with the image in it, essentially click on the document with the left mouse button squeezed. Keep the button pushed down and drag the image record to the space where you can carry documents to transfer. Once there, let go of the mouse button, and the image will be shared. The other adaptation is to choose “Transfer documents” and discover the organizer wherein the image is found and double tap on the picture.
Assuming you need to transfer numerous pictures simultaneously, you can choose more photos in the envelope (holding down the control (CTRL) button and tapping on the images you need to transfer.
What To Do After The Image Is Transferred?
When the image is transferred, it will be added to your media library. If you share one picture, you will want to see a thumbnail on the right side. You can then add a picture title, an inscription (you will see this message under the picture when it is introduced in your blog), and an ALT message (since Google doesn’t see the picture, you can disclose to Google what the image is tied in with utilizing the ALT tag) and a depiction (a bit more with regards to the image portrayal later). I neglected to compose that the ALT text is the thing that goes apparent to guests who don’t download the picture on your webpage, so it tends to merit making it great.
You will add an arrangement to the image after adding a picture title, subtitle, ALT-tag, and a portrayal. If you set the account to none, the image will ordinarily be added to the left half of your blog, with no text on any side of it. If you pick left or right, the image will permit the reader close to it, which can be extremely helpful if the image has a little size. On the off chance that you pick the middle arrangement, the image will be focused, with no text on one or the other side of it.
After setting the arrangement, you will pick what the picture should connect to. Right now, there are four choices.
Custom URL – you can add a URL to which you need the picture to allude.
Media record – when individuals click the picture, they will see the picture document itself on another page.
Connection page – when somebody clicks the picture, they will allude to one more page with a similar plan as your whole blog where the image can be seen, along with the picture depiction you added before.
None – the picture will turn un-interactive and not allude to anything
The last alternative before complete is to pick the size of the picture. You can ordinarily choose between Standard, Enormous, Medium and Little. Close to the names, you will perceive what that implies regarding the estimate, so you simply select the adaptation that suits your blog the best. Be mindful of adding a full picture on the off chance that it has a huge size because a blog regularly has a width of 600 or 800 pixels, which means adding an image bigger than this will frequently make everything look weird. Read Also:- Pubg pc download
When you have done this, press “Addition Into Post,” and your image will be added to the post. Assuming you need to change the picture concerning arrangement, subtitle, ALT-text, title or size, you can press the picture in the supervisor of the post/page and press the “alter picture” symbol.
On the off chance that you don’t care for the concept, press the erase button. Regardless of whether you erase the image from the article, it will, in any case, be found in the media library, so on the off chance that you erase it and press the Add Media button once more, you will discover the image in the library and have the option to add it again to the article.
Best of luck, and keep your articles bright and with heaps of extraordinary pictures. Were you searching for outlines and images you can use on your site? Peruse our how to discover great drawings and designs for my blog entry.