
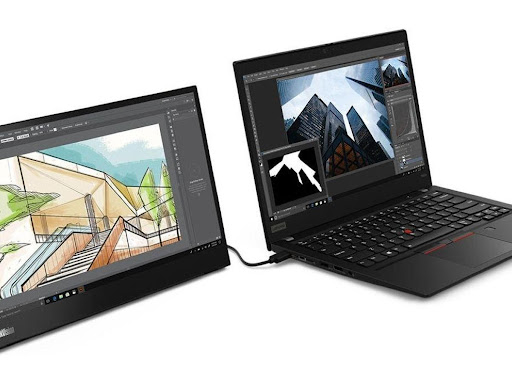
Did you realize that you can connect your PC to a work area screen and grow your on-screen land to two full screens? What’s significantly cooler is that on the off chance that you move up to a Laptop with Windows* 10, you can relegate a different review mode for the two screens.
The Advantage of Connecting Your Monitor to a Laptop
PCs aren’t simply remote, compact PCs. With the right arrangement, you can transform your PC a performing various tasks workhorse that will make you say “Well, I never figured I could do all that!” All you needed to do is cling to the fundamental rules on the most ideal way to interface a PC to a screen. Then, you’ll be set.
Getting more screen inches isn’t the main explanation somebody should interface a screen to a PC. The following are a few situations that explain a portion of different advantages.
Performing various tasks: Connecting your PC to a Monitor empowers you to go into split-screen mode, where you can watch a film on your PC screen and tweet about it on your PC screen. This gives you a cool arrangement that keeps you from continuing to flip to and fro between applications.
More screen land: By interfacing your PC to a screen, you can in a real sense twofold the size of your accessible screen space. Capacities can be moved from one screen to the next with the goal that you don’t need to shrivel windows down or switch to see two projects simultaneously. This sort of arrangement is great for various situations, from recreation exercises like video talking while you’re on Facebook to refreshing a work bookkeeping page while you’re referring to realities on another stage.
Additional choices in Windows* 10: With Windows* 10, you can pick between a conventional work area see or the new metro menu. Yet, when you associate your PC to a subsequent work area screen, you can really have it both ways by running both simultaneously.
3 Points You’ll Have to Do When Connecting Your Laptop to a Monitor
Get the right link. At the point when you associate an outer screen to a PC, need to run a link between the two gadgets. Ensure that you get a screen link that coordinates with the attachments on your PC and screen.
Tell your working framework you’re utilizing a subsequent screen. It’s not difficult to do this in Windows* 10 by going to your Desktop, right-click your mouse, and going to Display Settings. On Macs, the association of an outside screen is consequently perceived.
Set up the direction of the screens. In the two PCs and Macs, you can select whether you need the subsequent screen to reflect your PC screen or to go about as an augmentation of the first.
Figuring out how to associate your PC to a screen is really straightforward and can upgrade your experience, even work on your efficiency. Envision not truly flipping between open windows and running projects on your PC. Sounds very great, isn’t that so? Showing yourself this simple errand can simplify your life and be significantly more useful.
There are various motivations behind why you may need or have to associate your PC to an outside screen, including the requirement for a bigger screen, imparting a show to a little gathering, or even (pant!) if your PC show quits working. Every one of these situations can accompany its own degree of frenzy, however, relax, there is a way of interfacing and getting that additional screen space.
In the continually advancing universe of tech parts, the test might be in haggling among ports and connectors to make you journey on that subsequent screen. Here is a speedy summary of all that you wanted to know to make it work with an outside show or even various screens.
To start with, recognize what sort of ports are on your equipment. In an inexorably remote world, it is not difficult to dismiss the life systems of your gear (ahem) however even the most remote PCs actually have a choice to associate. Since ports like to be covered up, a few screens may have a supportive sign guiding you where to discover them:
Decide your PC’s video yield choices. Most workstations have a solitary showcase association along the back, however, some might be situated at the edge. There are a couple of principal kinds of associations that your PC might have:
Windows:
- HDMI – This port takes after a 3/4 inch, six-sided, tightened port found on most Windows PCs.
- DisplayPort – Similar to HDMI, however one corner of the port is creased while different structures a 90-degree point.
- VGA or DVI – VGA ports are hued with 15 openings, while DVI ports are normally dark or white with 24 openings and a hole on one side. These ports are just found on more seasoned PCs.
Mac:
- Thunderclap 3 (additionally called USB-C) – An oval port found on the sides of most present-day MacBooks.
- HDMI – A six-sided, tightened port found on some MacBooks.
- Smaller than expected DisplayPort – A six-sided port found on Macs made somewhere in the range of 2008 and 2016.
Figure out what your screen’s video input is. Straightforward PC screens normally just have one accessible info, while TV screens have different information sources. You can hope to discover HDMI or DisplayPort inputs on the backs of most screens. More established PC screens might utilize a VGA or DVI link association.
Associate the opposite finish of the link to your screen. Match the state of the opposite finish of the video association link with the port on the TV and addition it.
On the off chance that the screen requires an alternate sort of association than is on your PC, you’ll need a connector link to interface with your screen. A few connectors just fill in as an extension between two link types. For instance, a VGA-to-HDMI connector will permit you to interface a VGA link toward one side, and an HDMI link on the other. Normal connector links incorporate the accompanying:
- HDMI-to-DisplayPort.
- DisplayPort to-HDMI.
- Small DisplayPort-to-DisplayPort.
- USB-C-to-HDMI (or DisplayPort).
- VGA-to-HDMI.
- DVI-to-HDMI.
Module and turn on the screen. Connect your screen to a force source (e.g., a plug), then, at that point, press the screen’s Power Image named Windowspower.png button.
In the event that you needed to purchase a connector (not a connector link), you may likewise need to plug the connector’s force link into a force source.
Select the video source on the screen. In case you are utilizing a screen or TV that has various data sources, you should choose the port you associated your PC with on the screen. To choose the video source, press the button that says “Information”, “Source”. or on the other hand “Video Select” or something almost identical on the screen or remote.
Trust that your PC’s screen will show up on the screen. When you see your PC’s work area and symbols (or some variety thereof) show up on the’s screen, you can continue with setting up your PC’s showcase settings.
In case you’re attaching a VGA association, which is a blue association and has 3 columns of openings, you will probably have to switch shows. You can do this by squeezing a capacity key on your keyboard.
In the event that your work area doesn’t show up on the screen, see Method 2 to recognize a presentation utilizing Windows, and Method 3 to distinguish a showcase utilizing Mac.